The following article explains how to build a data capture template to suit your preferred Word Document design.
Tip: The document size must be less than 10MB.
- Save the Word Document to your computer, we will come back to this after the Data Capture has been designed.
- To begin, you will need to create a Data Capture with the information you would like to use for this template.
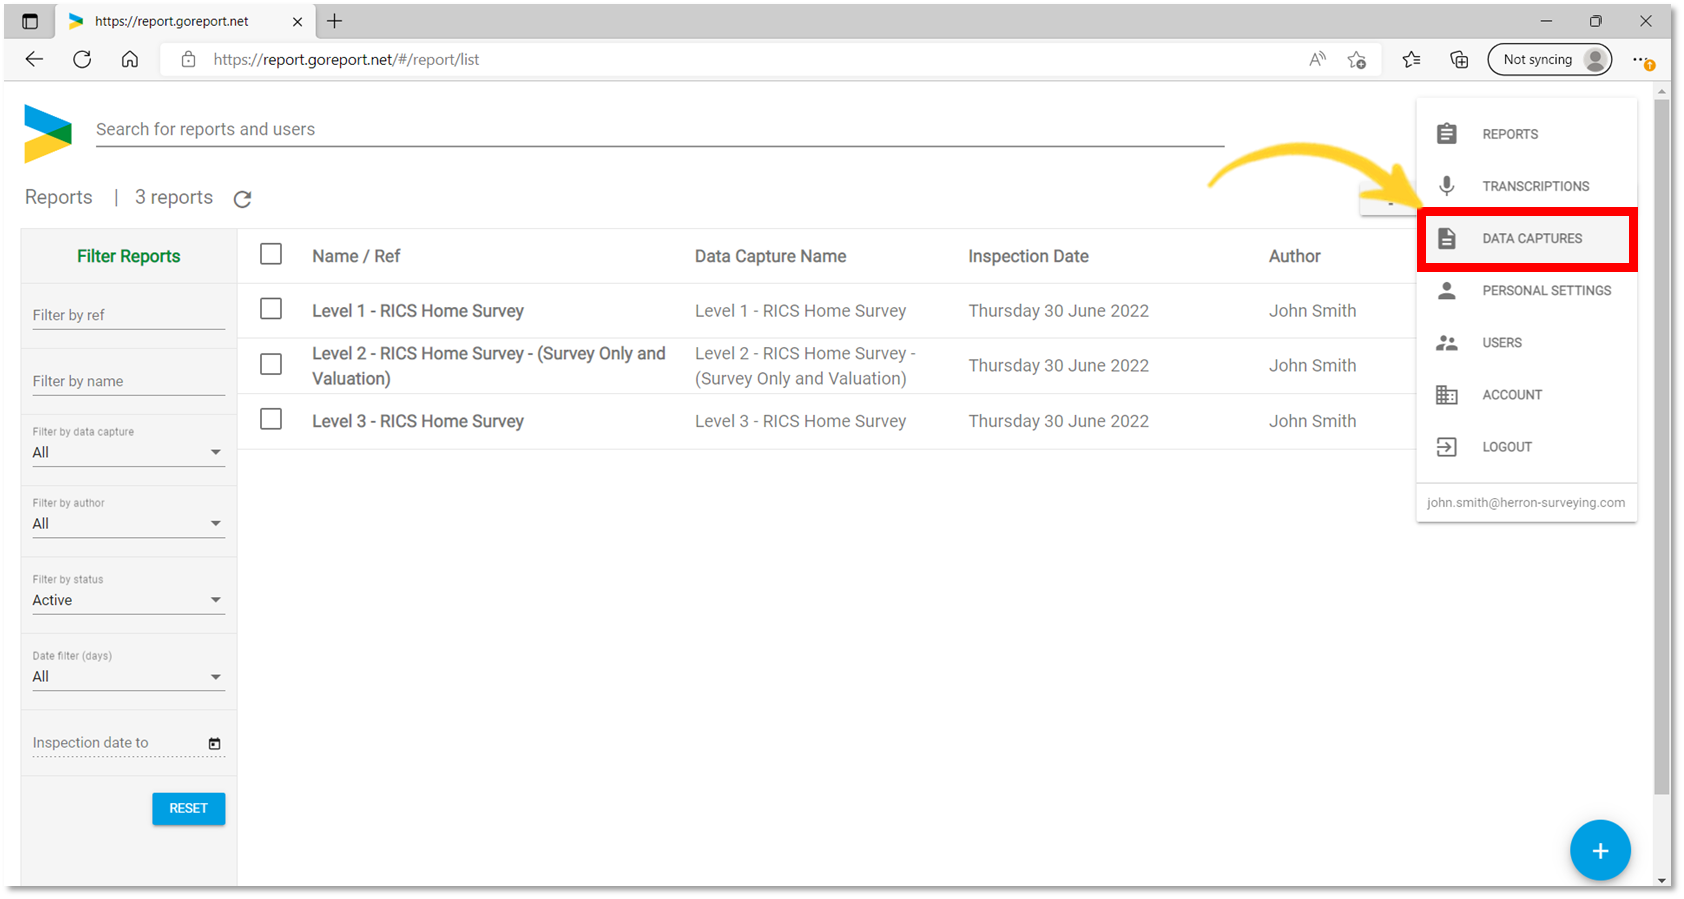
- Access your Data Captures via the Management Portal (as shown below).
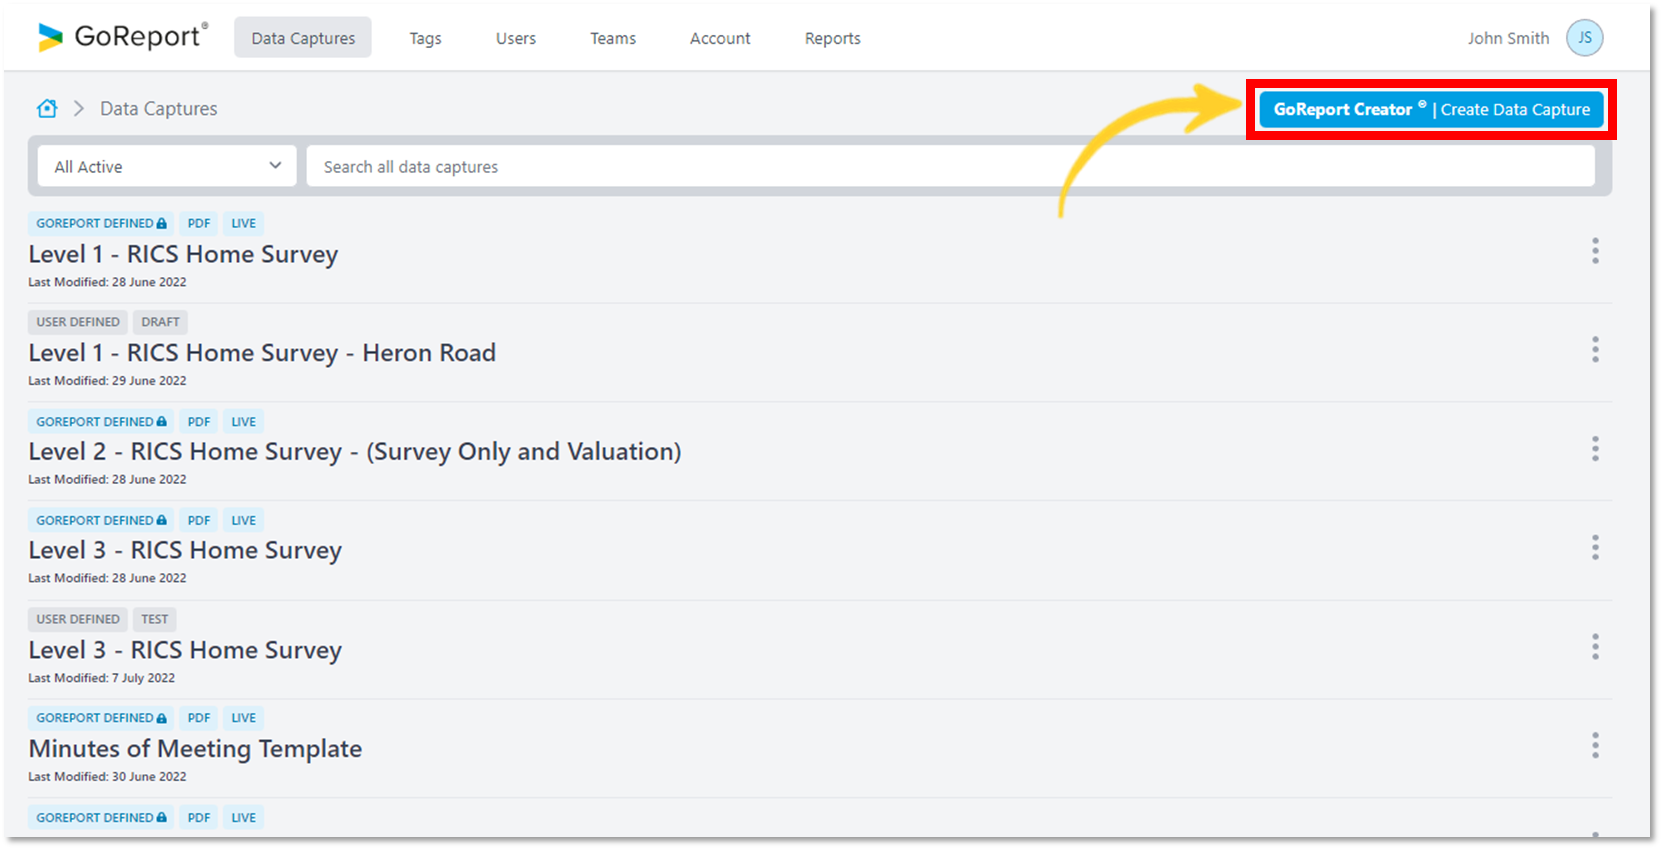
- To begin click on Create Data Capture.
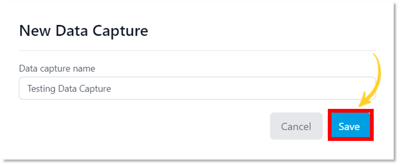
- Enter a name for the Data Capture.
- Click Save.
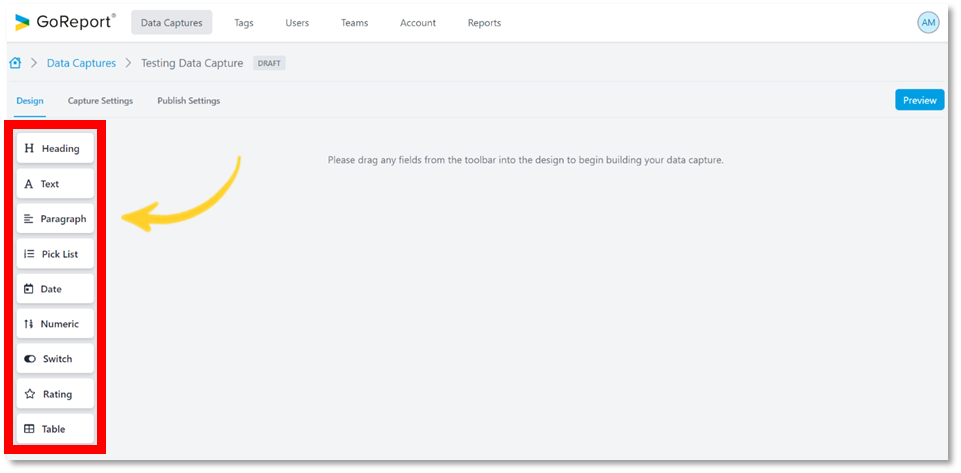
- Drag and drop each item into the centre of the screen to create your Data Capture.
- For more information on creating a Data Capture, check out our design articles >> GoReport Creator - How To
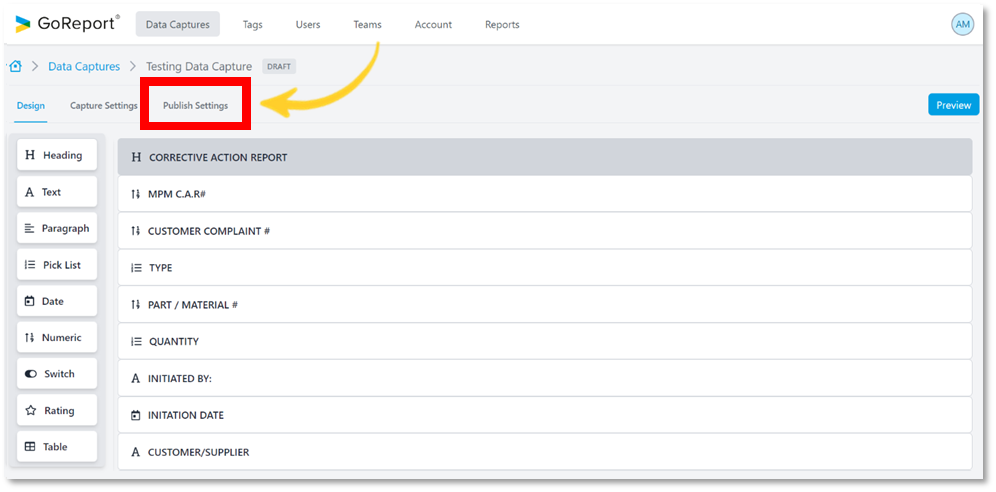
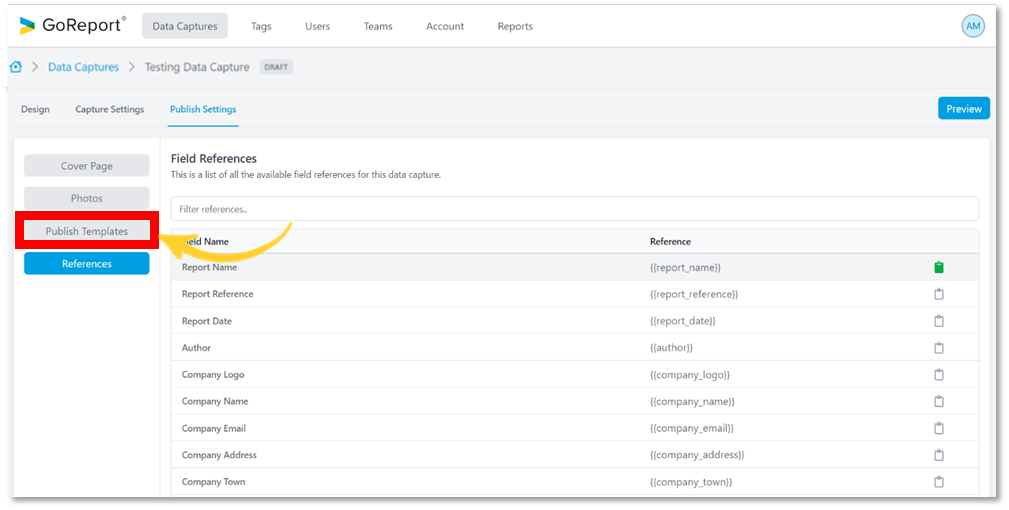
- When you have finished creating your Data Capture, go to Publish Settings.
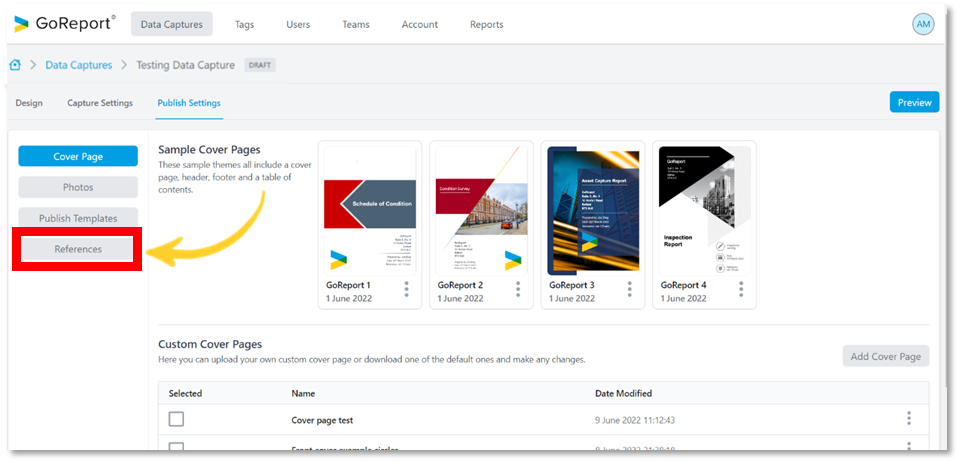
- Select References.
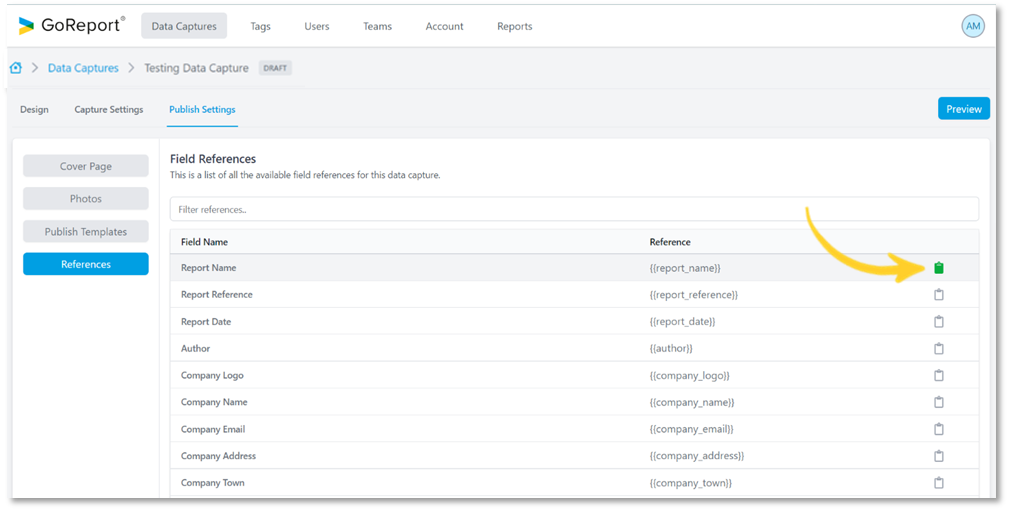
- Choose a reference and click on the clipboard icon to copy it.
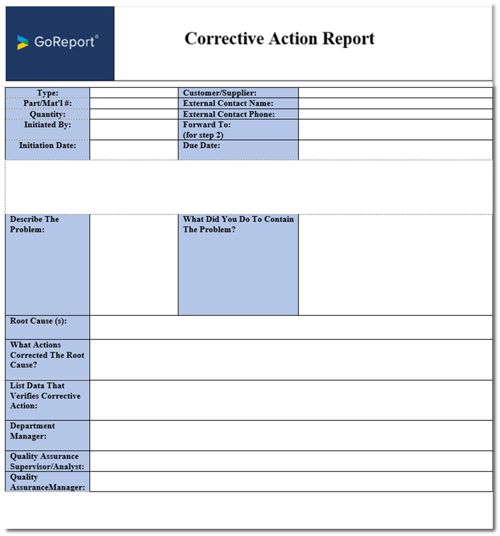
- Open the Template you created earlier in Microsoft Word.
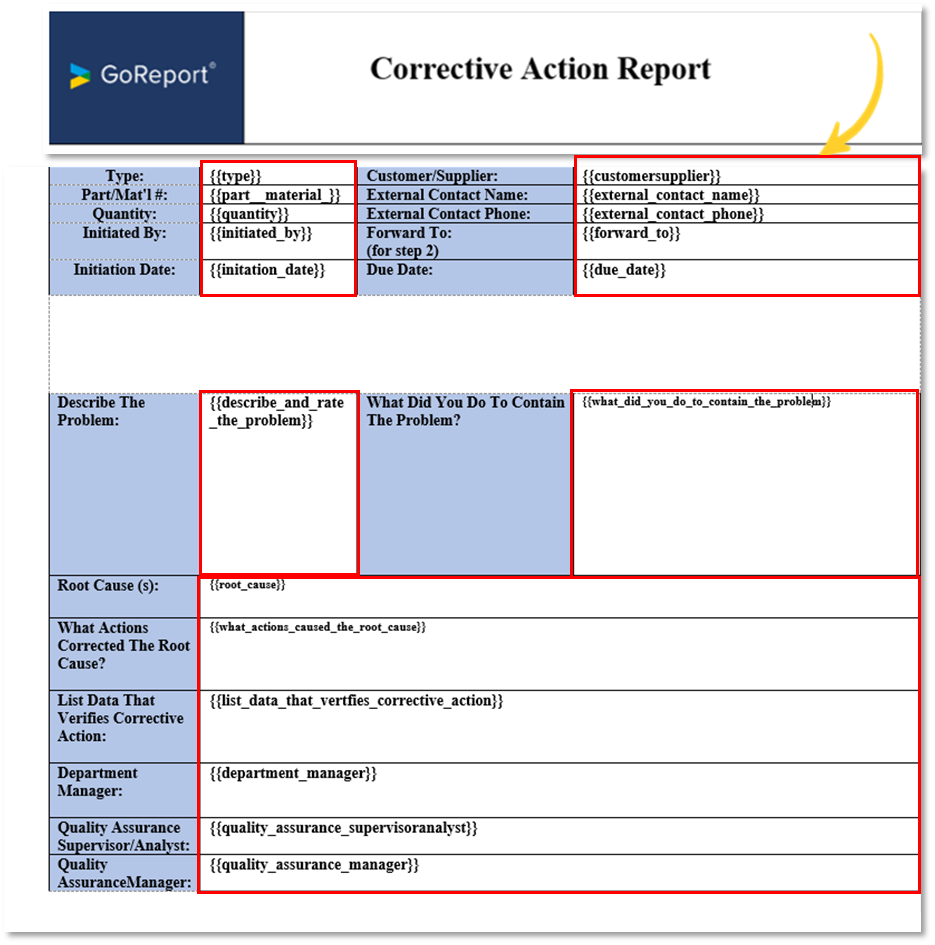
- Paste the Reference into the areas of the Template where the data should be placed (as shown below). Repeat this step for each Reference until you have copy and pasted all the required References.
- Save the document to your files and return to the web portal to upload the template.
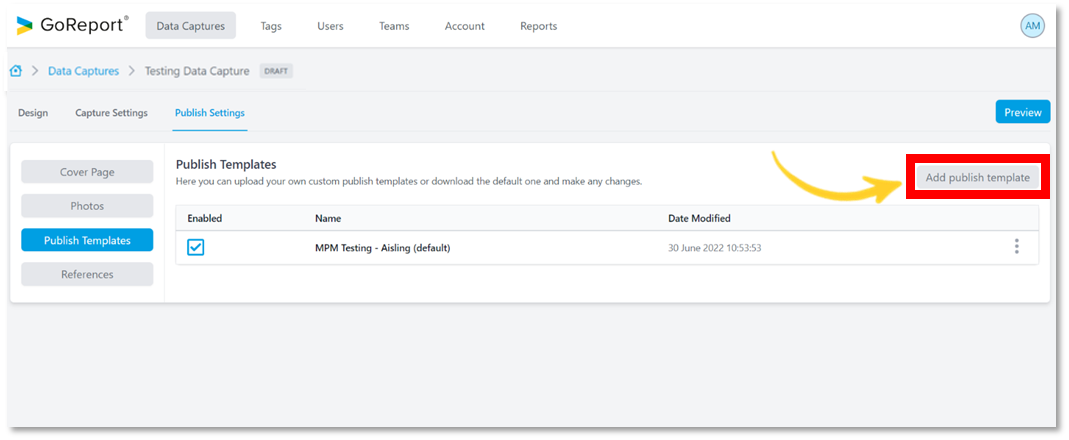
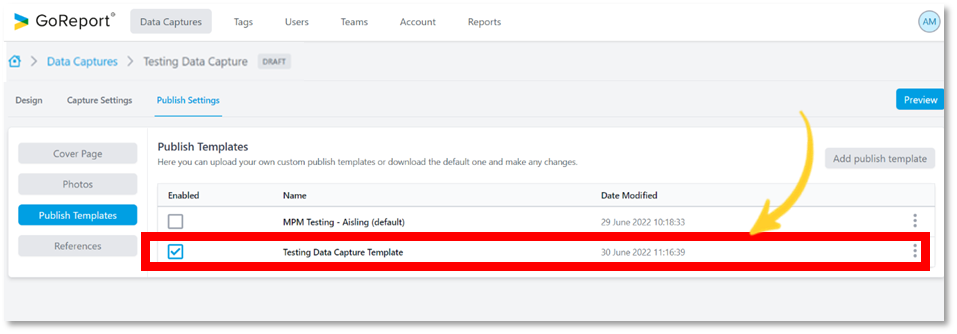
- Next select Publish Templates.
- Each Data Capture will have a standard output that is enabled. To upload your new template click Add Publish Template.
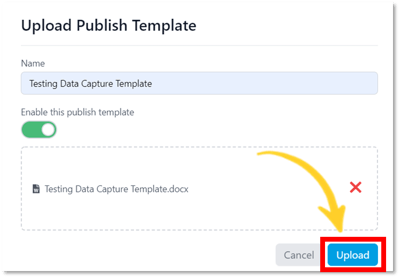
- Create a name for the new Template.
Tip: By default, the Publish Template will be enabled, however it can be changed by clicking the toggle button.
- Drag and drop the file or click Upload to access your computer files.
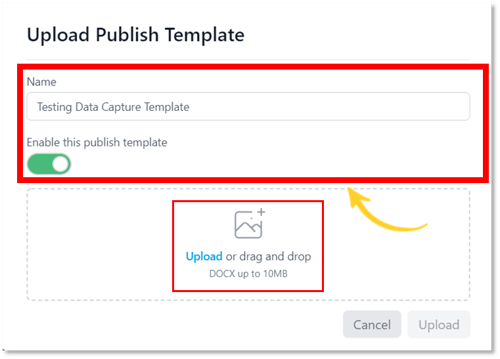
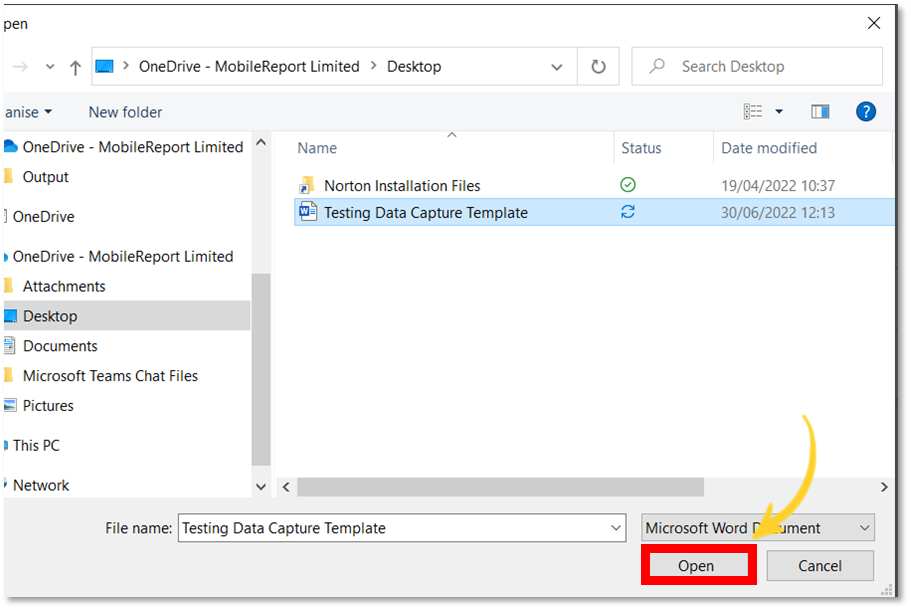
- Select the file you recently added references to and click Open.
- Click Upload.
The new template has been uploaded and is now the default output.
- Click the quick select icon (three dots) to view the option list for this template.
- You can rename, view, preview, delete and upload a new document.
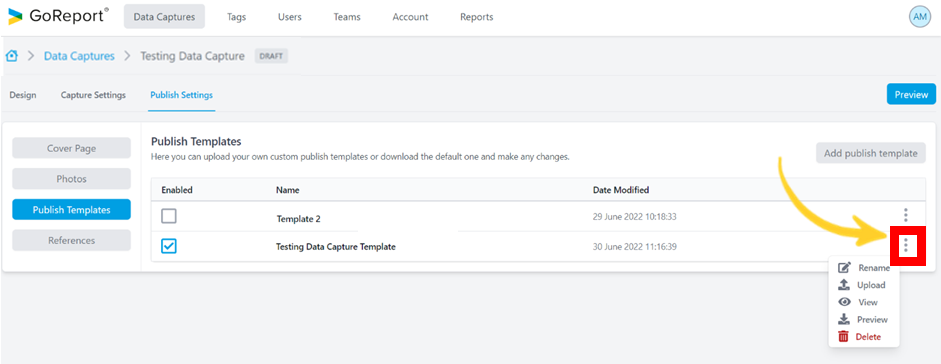
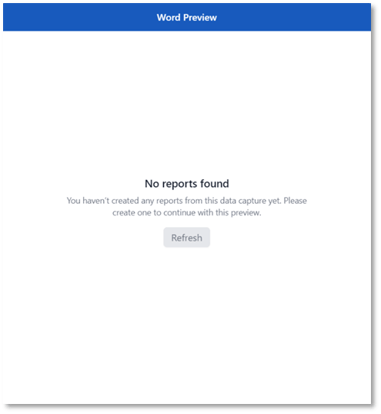
Tip: Preview will only be available AFTER creating a report with this data capture.
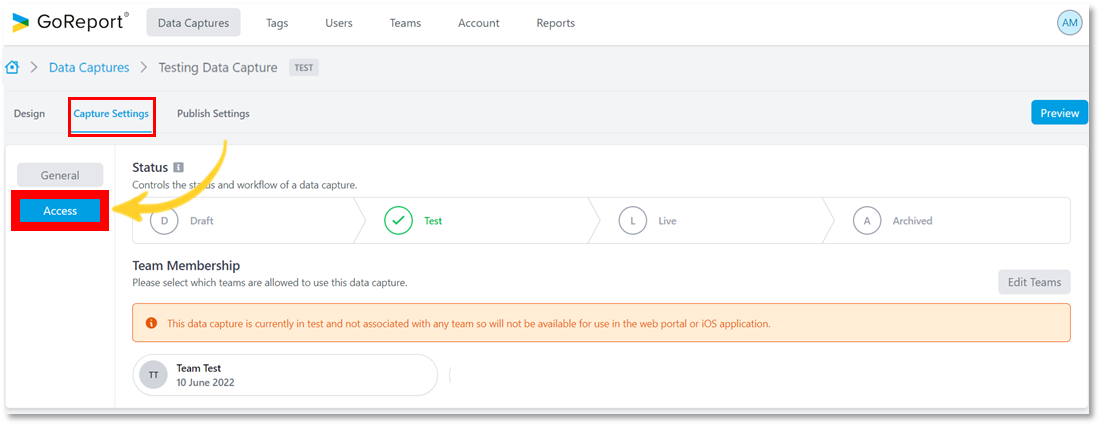
- To create a report, we must first ensure that the Data Capture is in "Test" mode and is assigned to a team.
- Go to Capture settings and click on Access.
- If the status is in Draft, click on Test to change it.
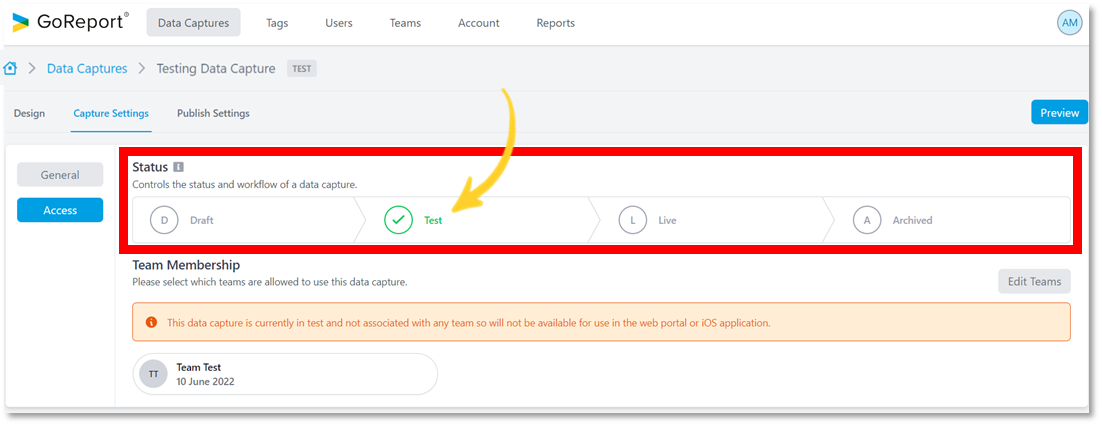
The Data Capture must be assigned to a TEAM to allow it to be used for testing.
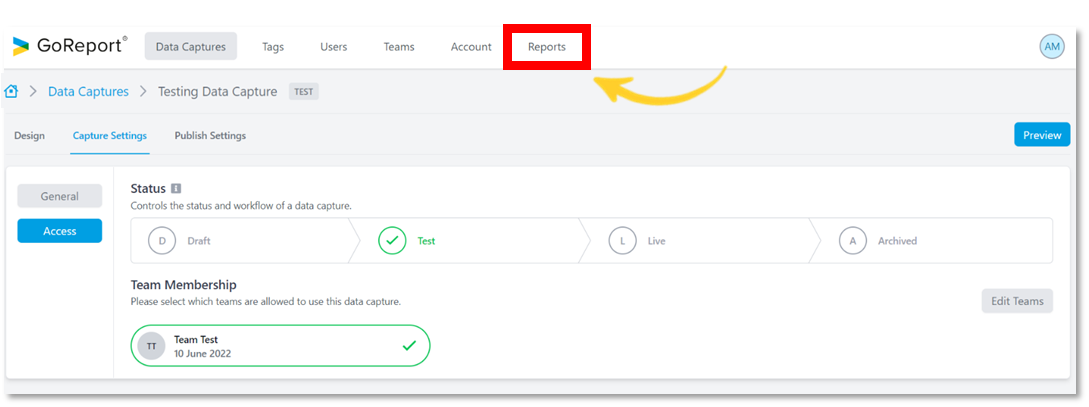
- Click on the Team you wish to assign the Data Capture to.

The Data Capture can now be accessed by the users in this Team.

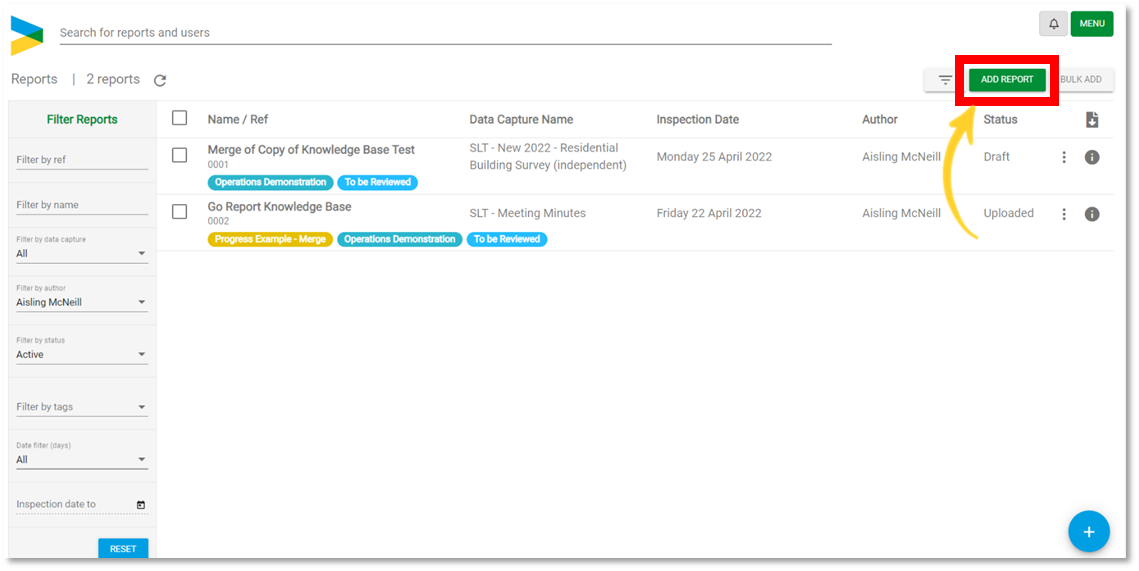
- To create a report using this Data Capture, click on Reports.
- Click Add Report.
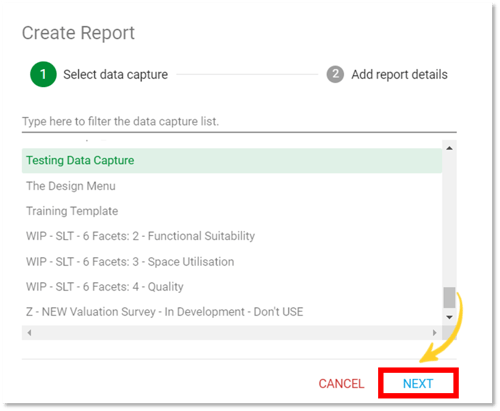
- Choose the Data Capture you wish to use.
- Click NEXT.
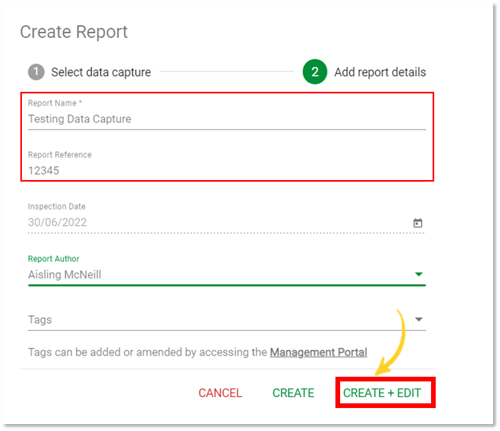
- Enter the details of the report and click CREATE + EDIT.
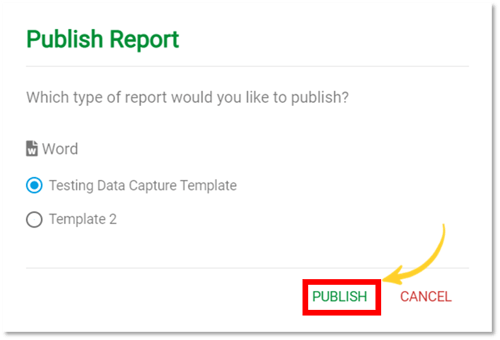
- Click Publish.
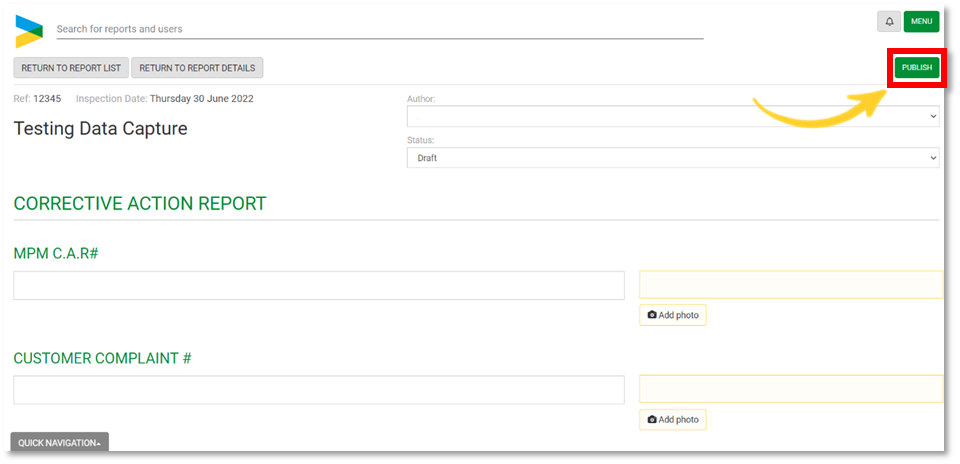
- Select the Template you would like to use and click Publish.
- The report has now been published with the new Template.
