GoReport SmartPins functionality allows you to tie together layout plans with your surveys and inspections, to provide accurate location information. When you issue a report, complete with a SmartPins layout in the appendix, your client knows exactly where in the building you are describing. In addition, you have the ability to colour code SmartPins to group them together in categories, making the final report visually appealing with the added benefit of being able to click on a SmartPin to display all the key data and even click straight through to the relevant entry in your report. The following article explains in detail how the use the GoReport SmartPins functionality.
Adding a Site Plan
Note: A site plan must be a PDF document.
- This example shows how to copy a file from your iOS device into the GoReport app.
- Files can also be copied directly from your e-mails using the same process of selecting and holding the file, and selecting Copy (see below).

- Select and hold the file to view the options list.
- Select Copy.

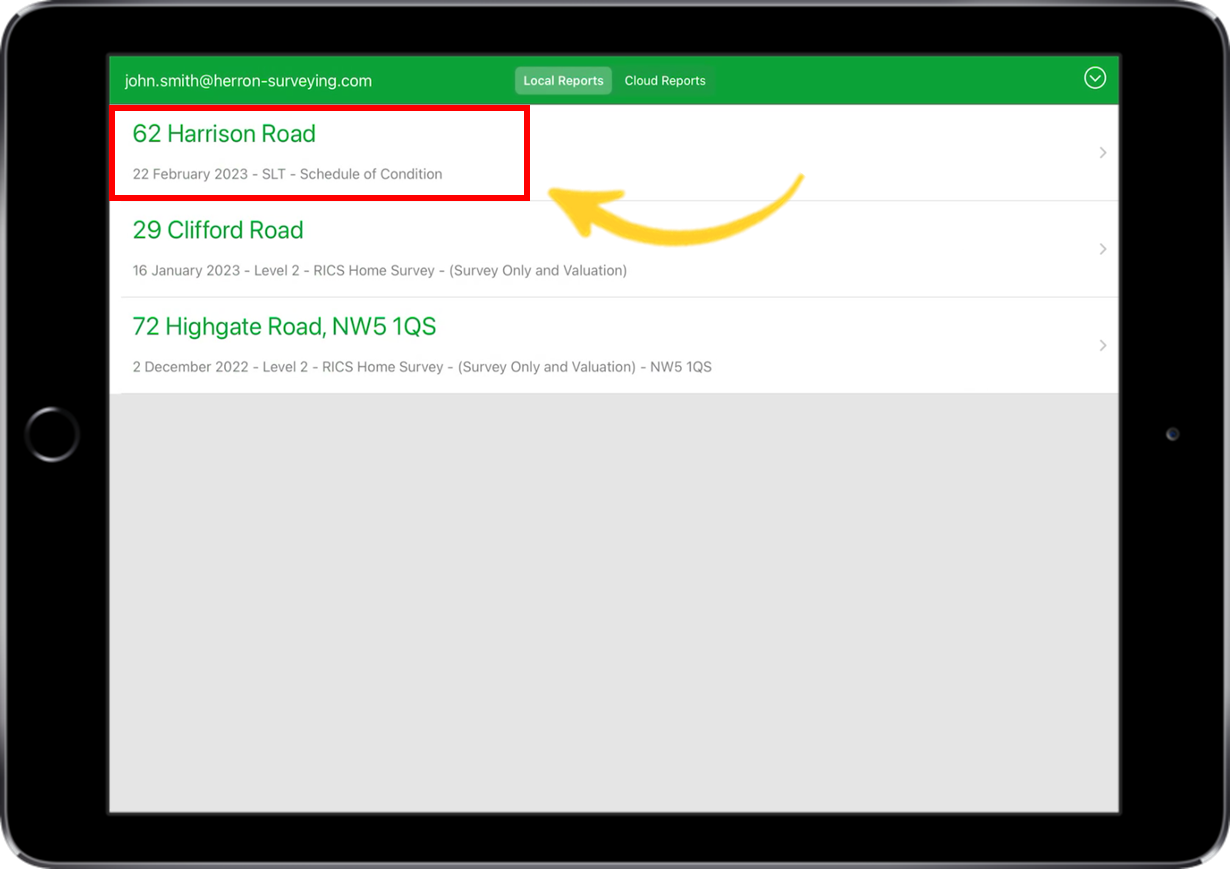
- Open the GoReport app.
- Select your report.
- For this example we are using a Schedule of Condition report.
- Select the drop down icon and then select Add Site Plan (as shown below).
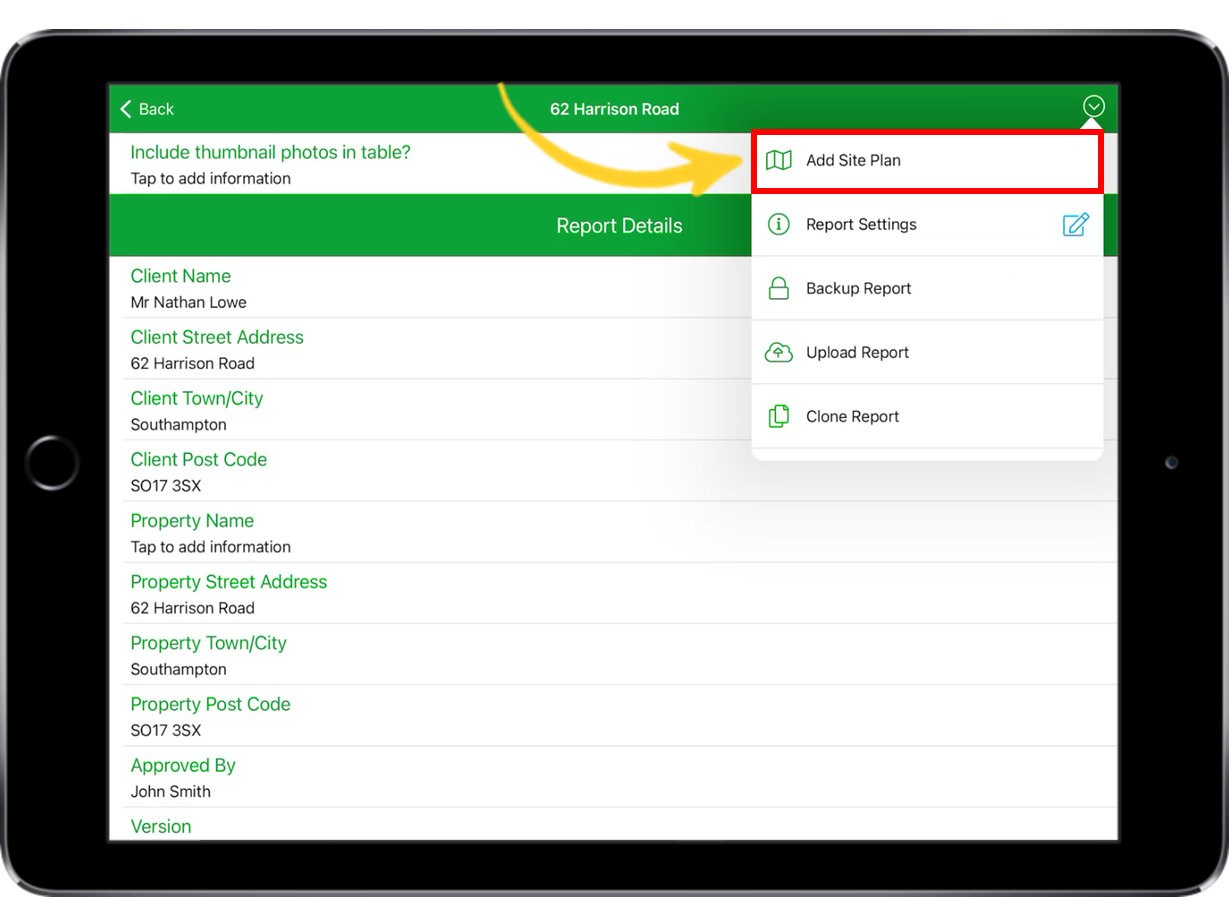
Note: If you do not have the option to Add Site Plan, it is possible that it has not been enabled on your template. Contact GoReport Support for more information on enabling this feature.
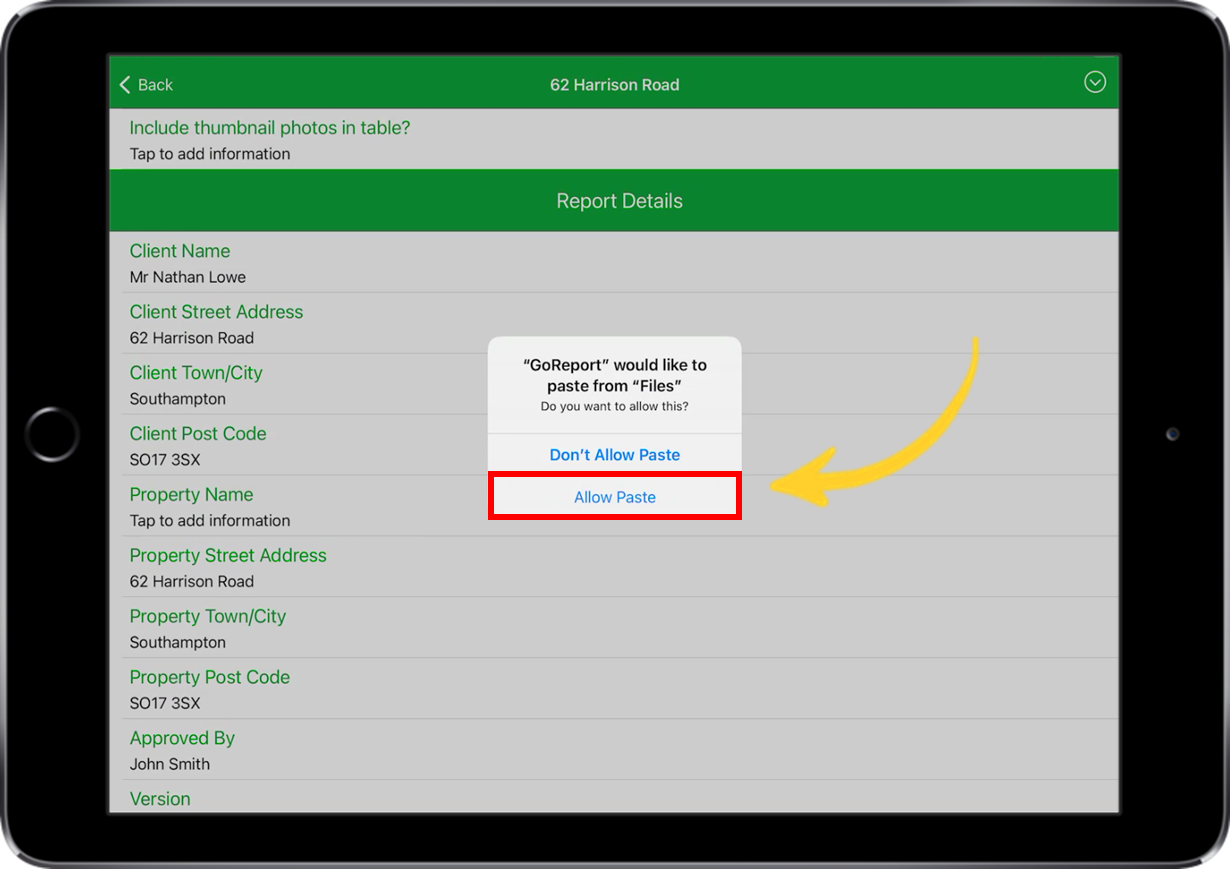
Note: If you receive an error message (see below) it means the site plan has not been copied from your device. Try repeating the steps above to ensure the file has been copied correctly.
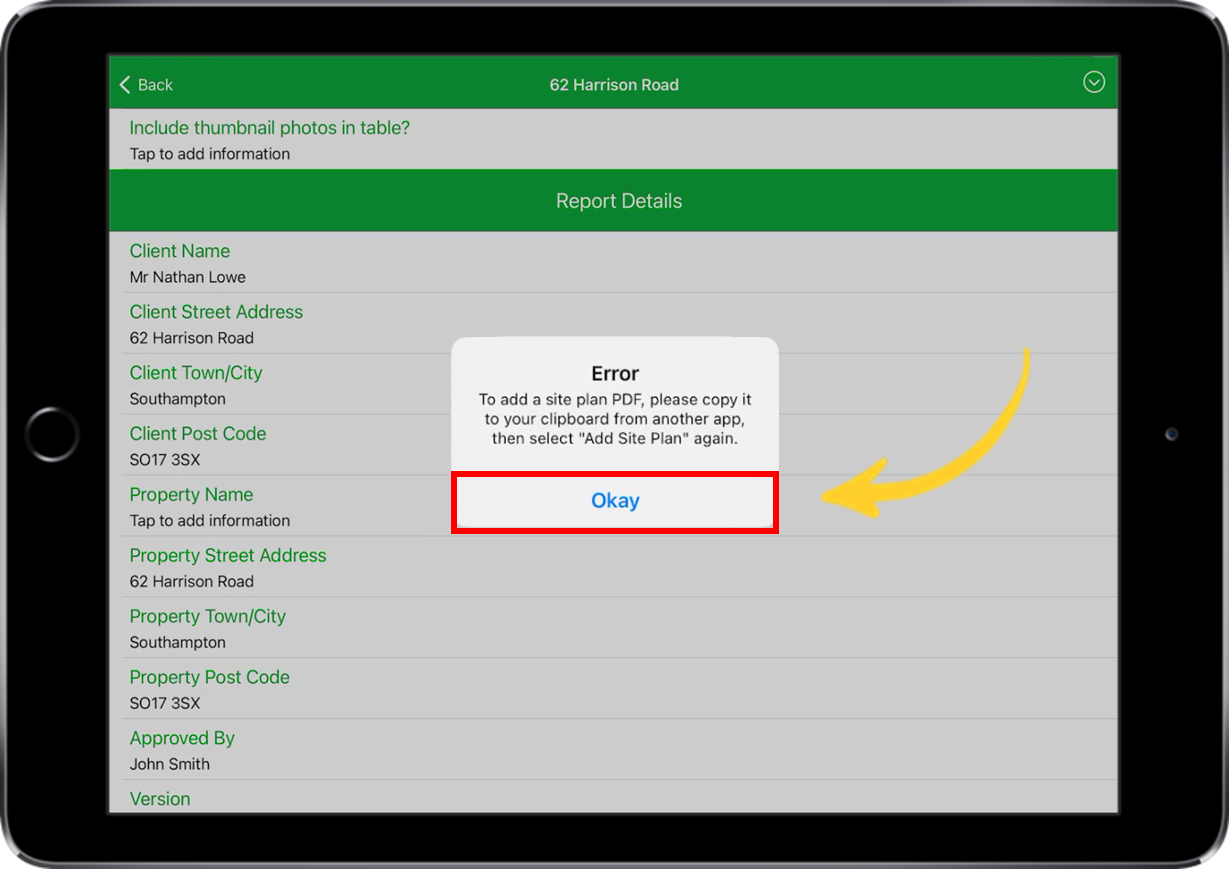
- Select Allow Paste.
- The site plan will be added to the report.

Adding and Editing a SmartPin
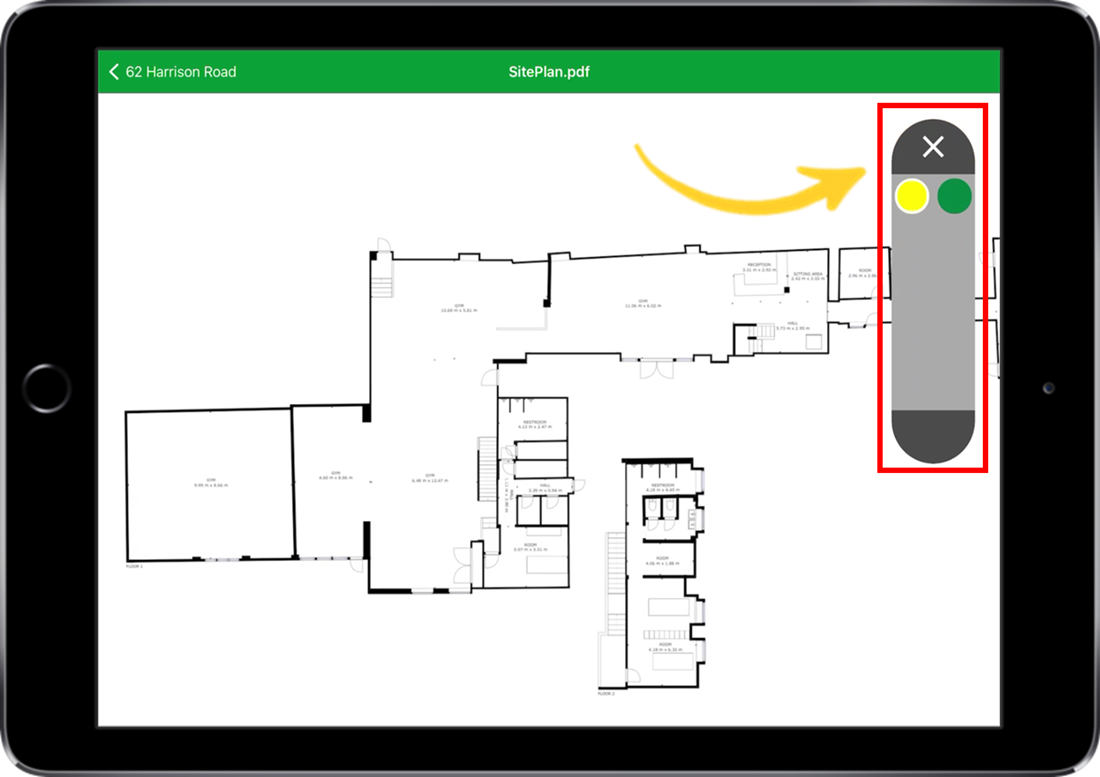
- Select the SmartPin icon to expand a list of colours available.

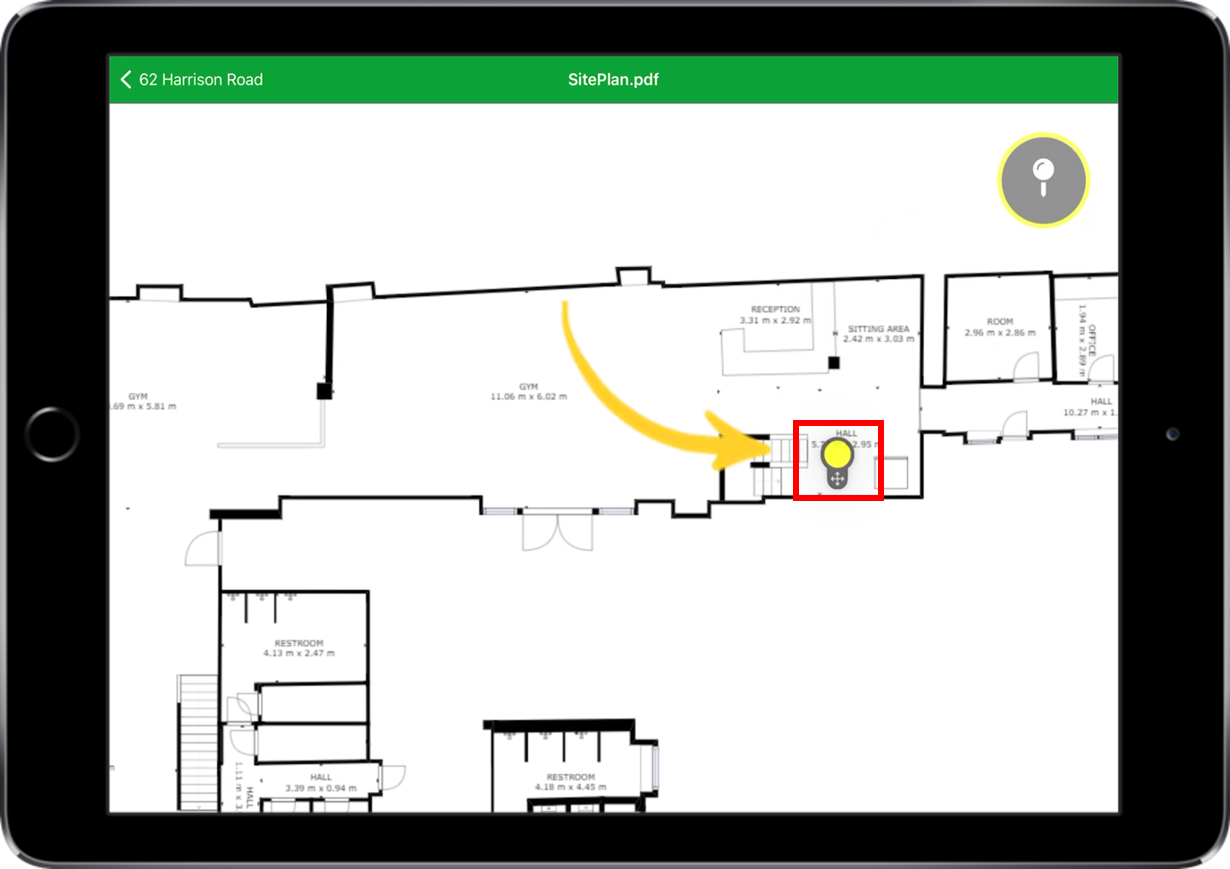
- Select, drag and drop the pin icon anywhere on the site plan.
-
After the pin has dropped, you will be redirected to the relevant row within the Schedule of Condition (SOC) table.

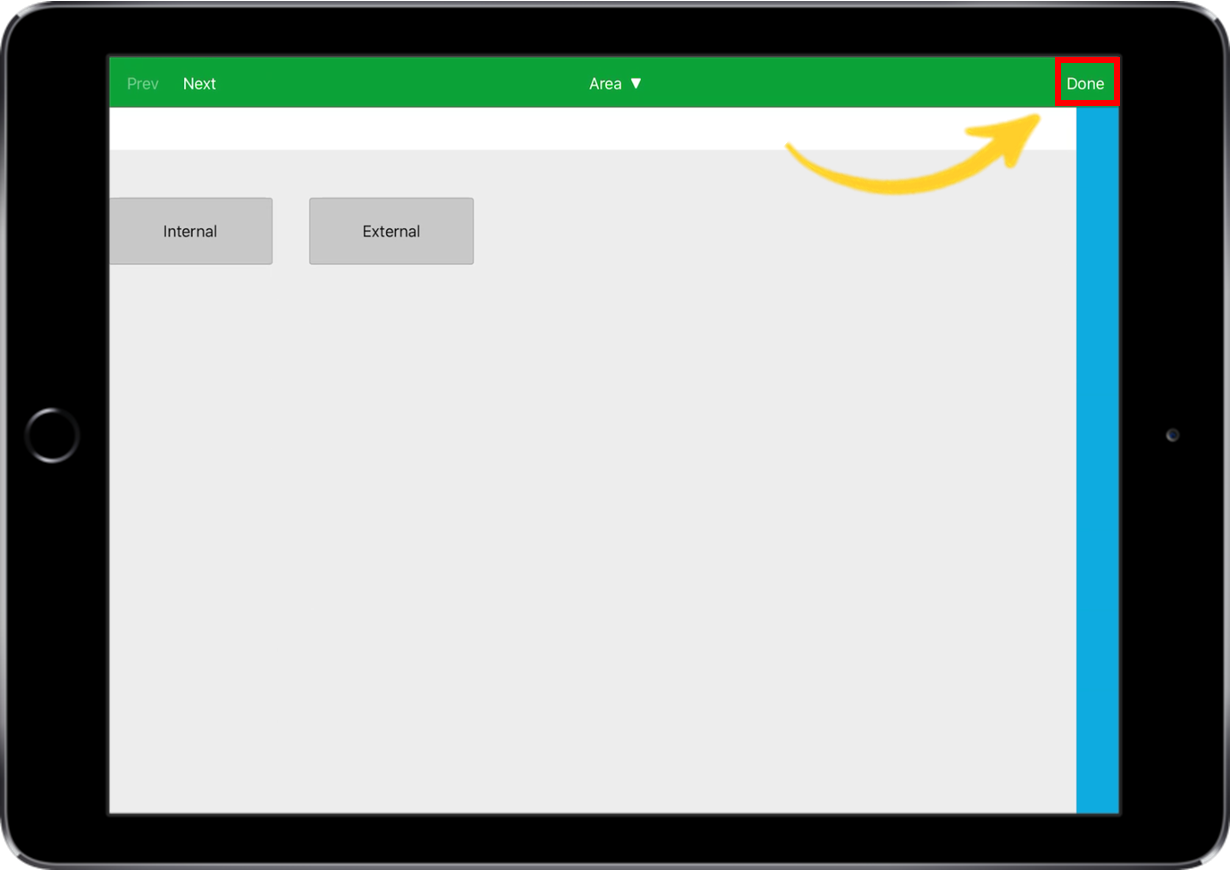
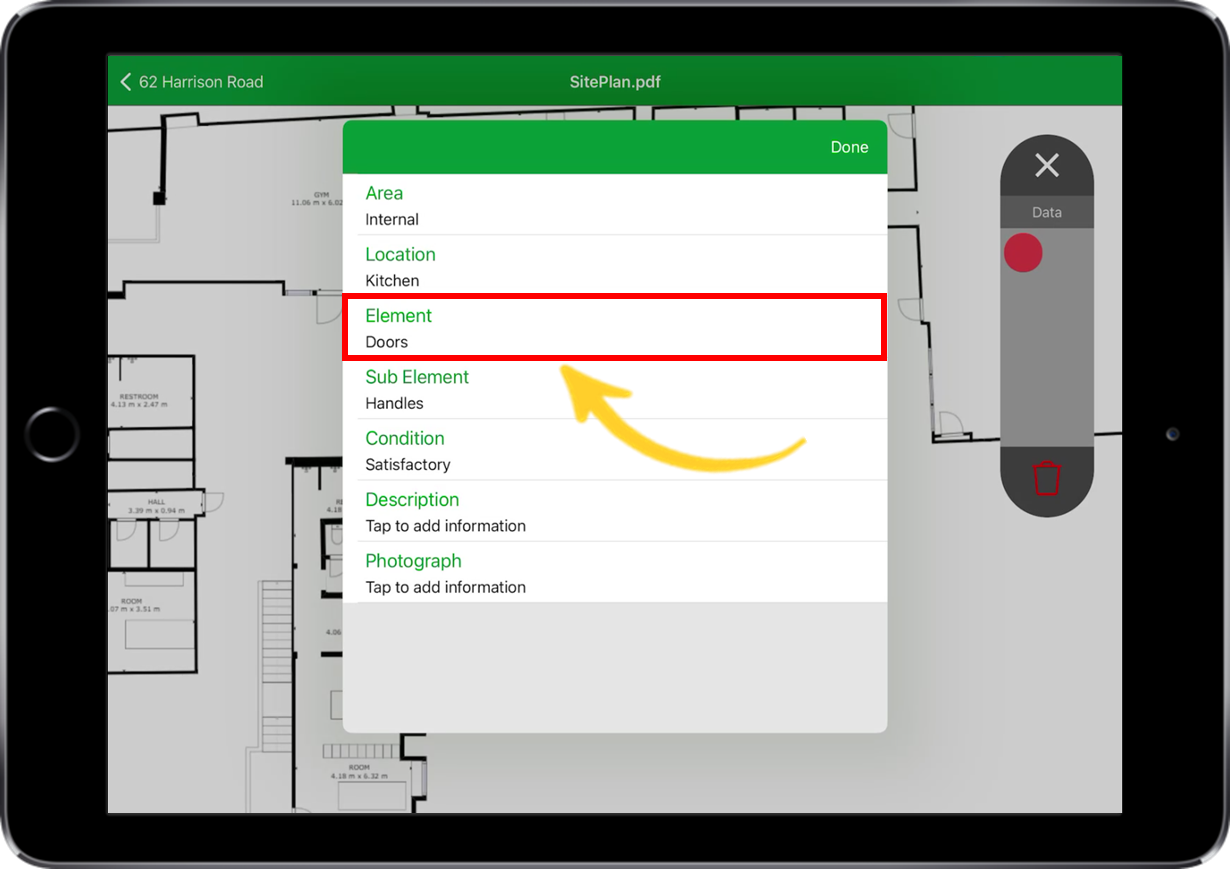
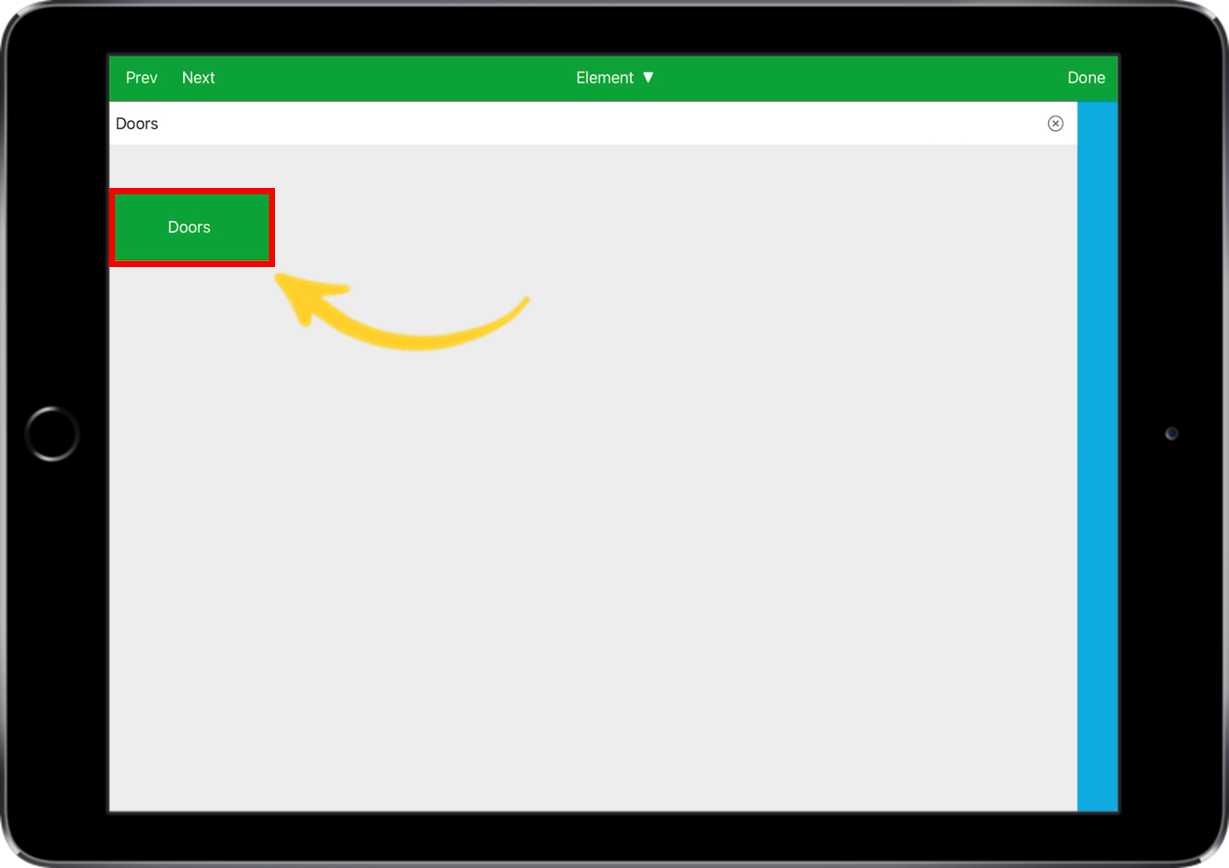
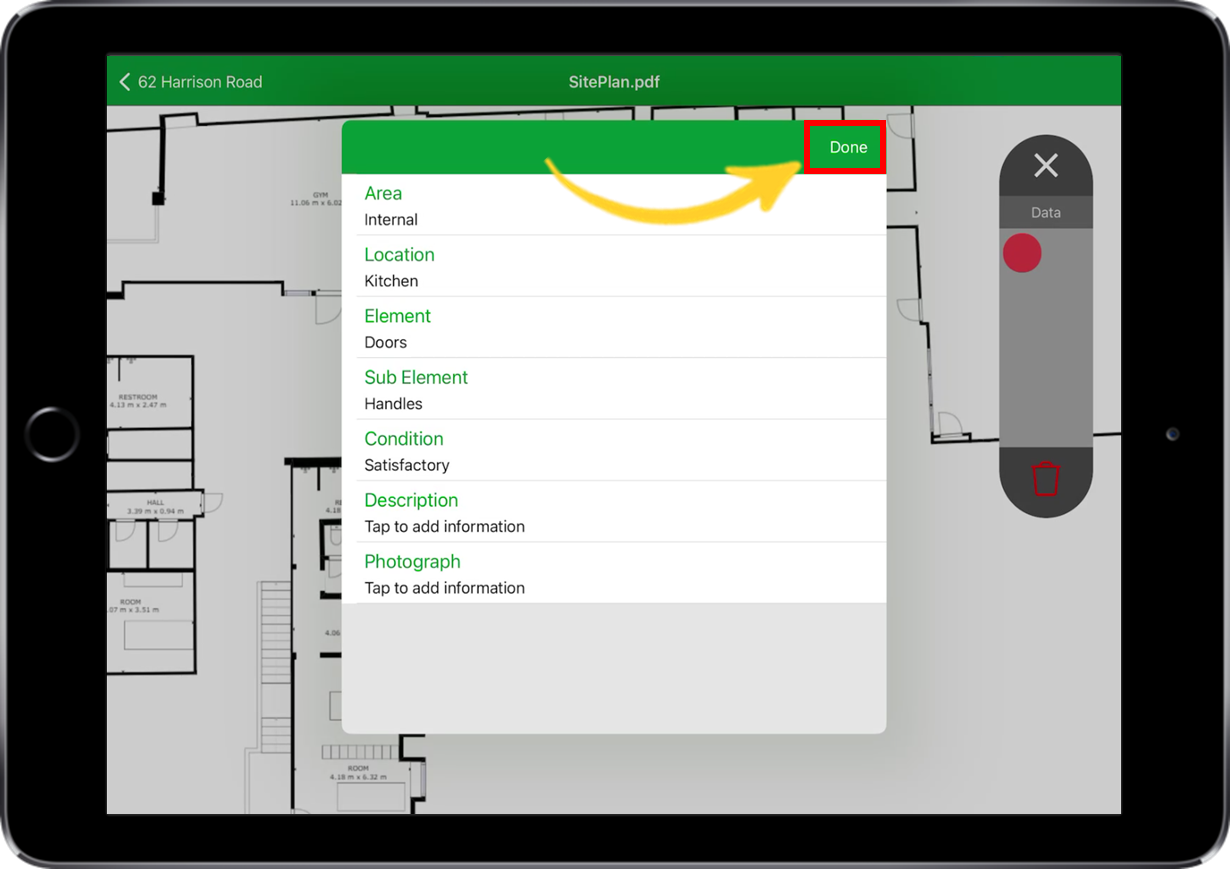
- Enter the data for each row within the table.
Tip: Swipe left / right to navigate between the sections.
- Select Done when you are finished.
- You can move the location of a SmartPin by selecting, dragging and dropping the pin.

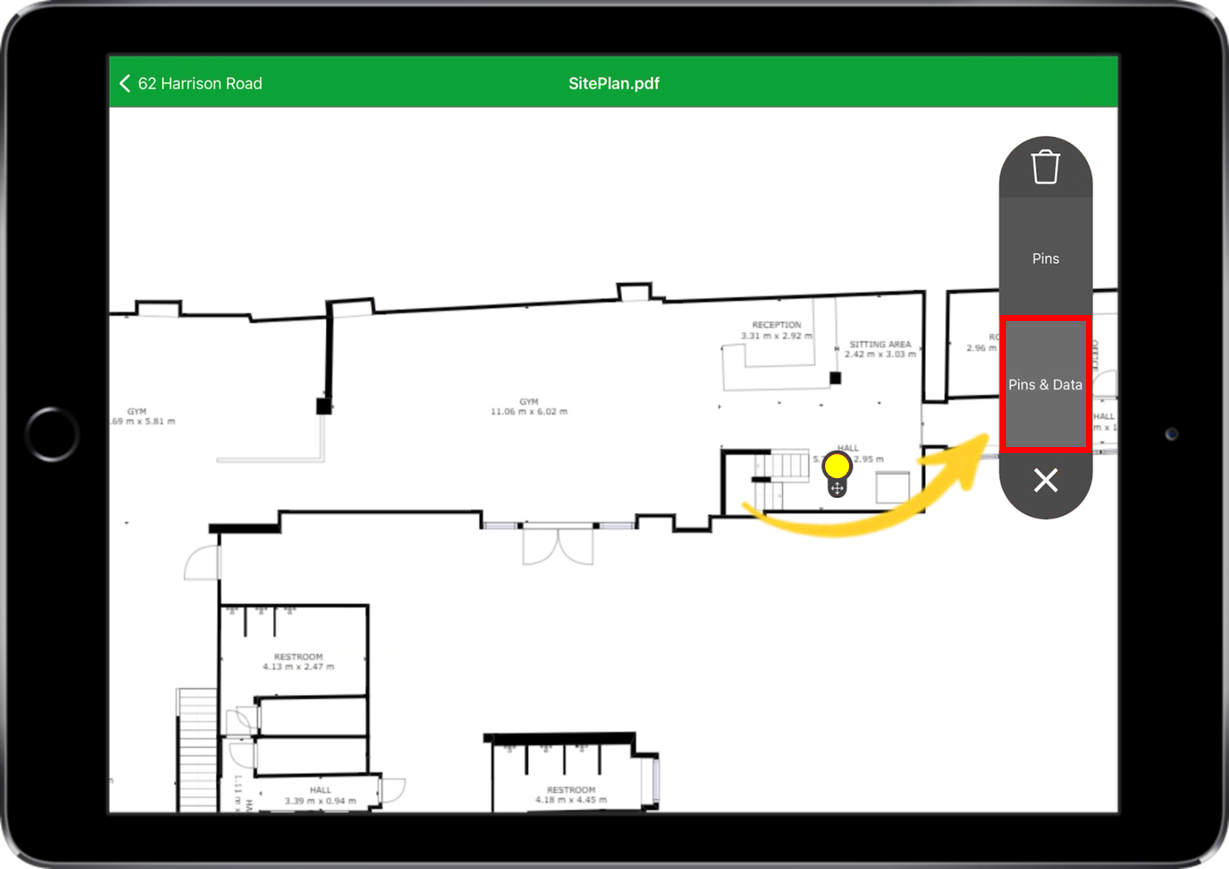
- You can view the data associated with a SmartPin and edit it's content by selecting the pin and selecting Data (as shown below).
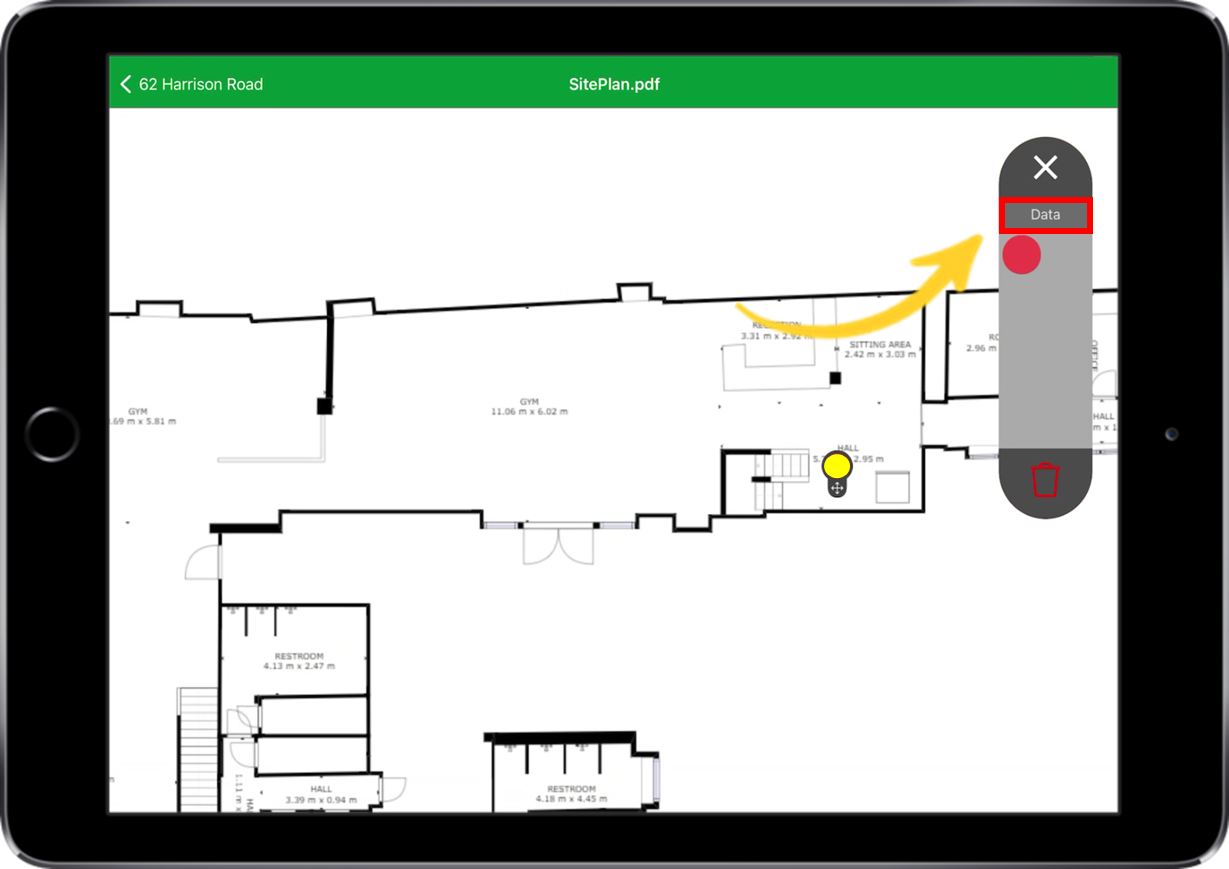
- Simply select one of the sections to edit the information.
- Select Done to return to the site plan.
- To delete a SmartPin, simply select the pin and select the trash icon (as shown below).
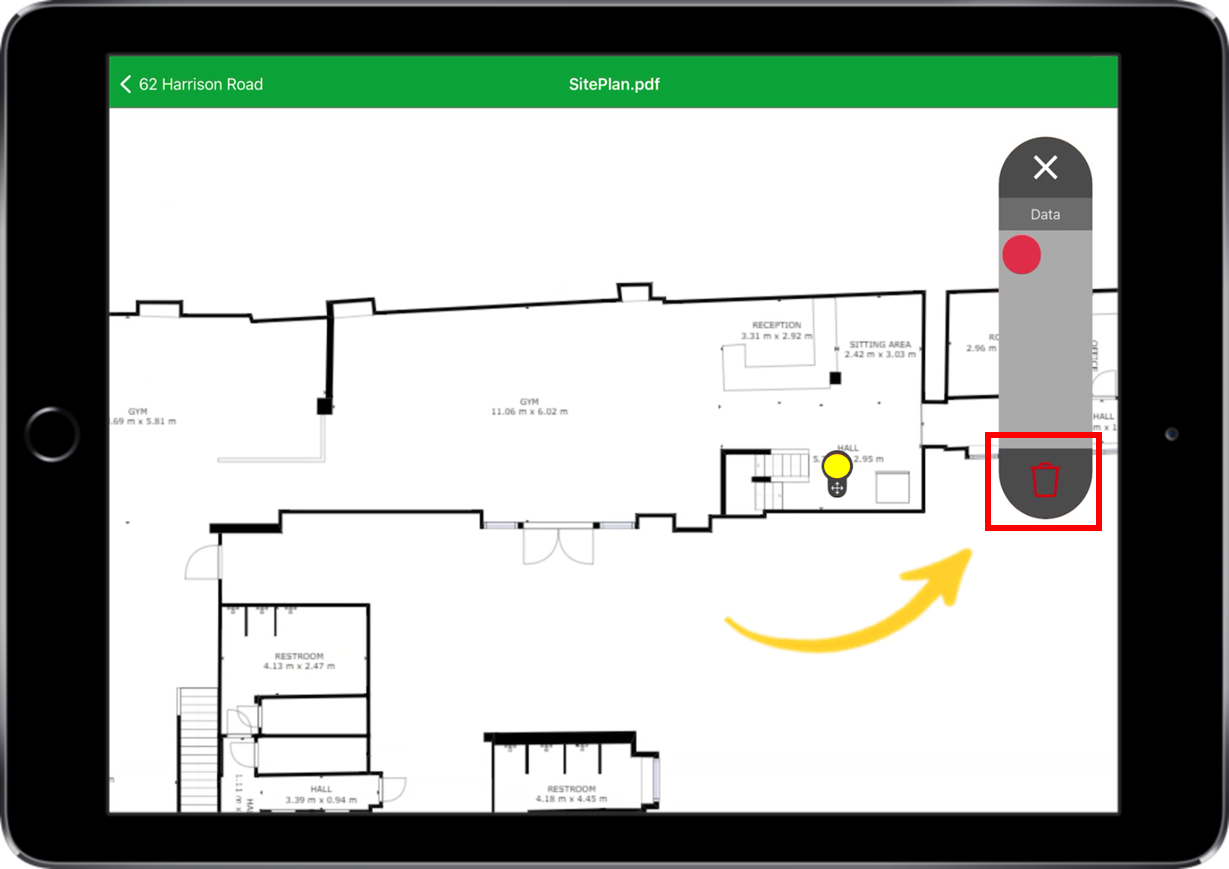
- You have the option to delete the pin, or the pin and it's data.
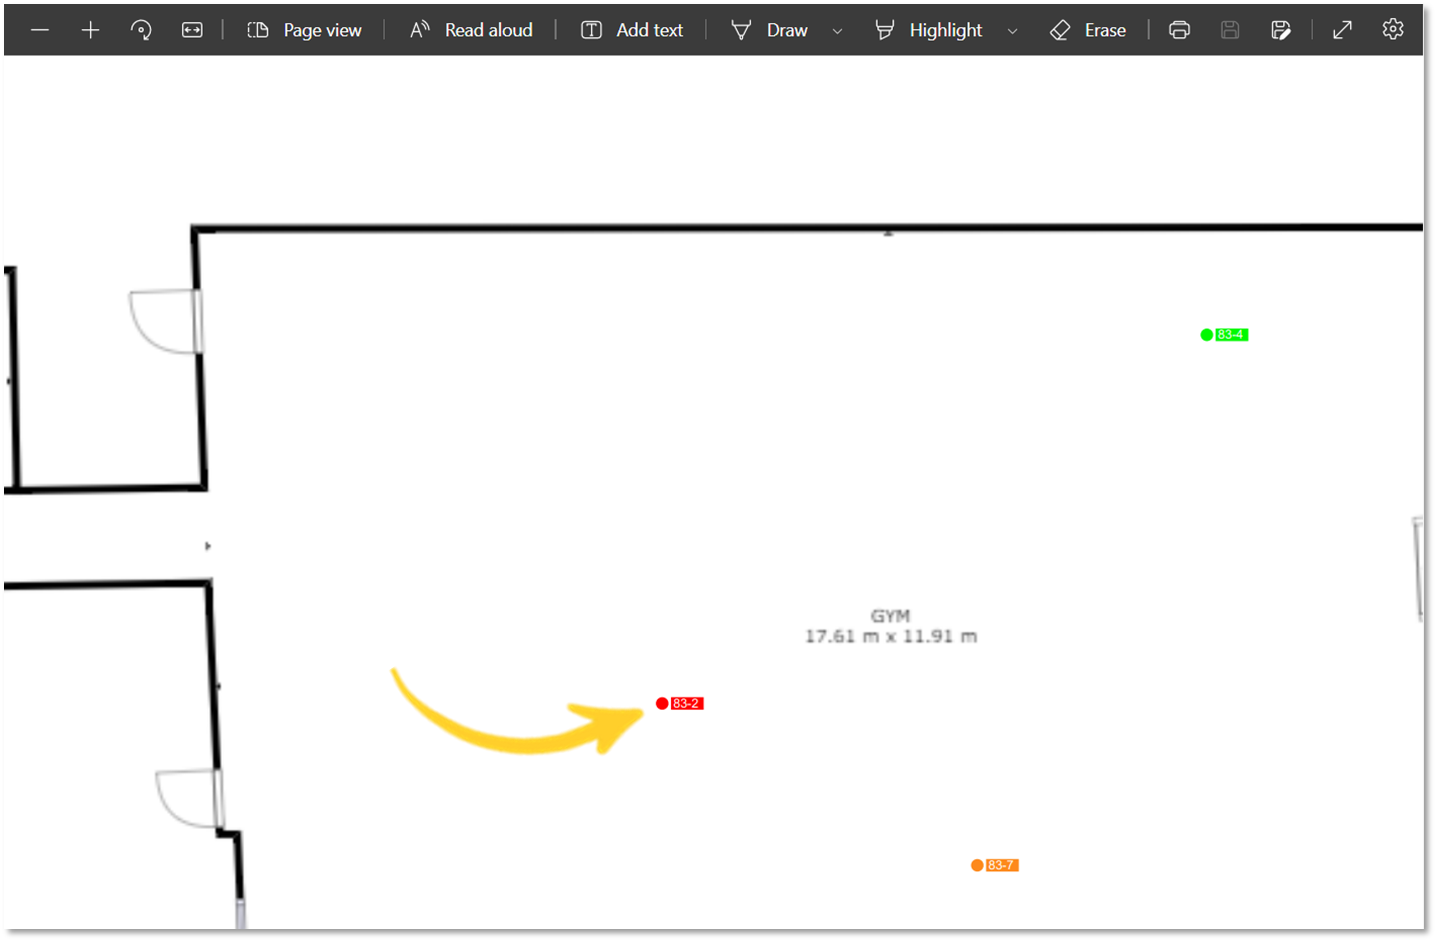
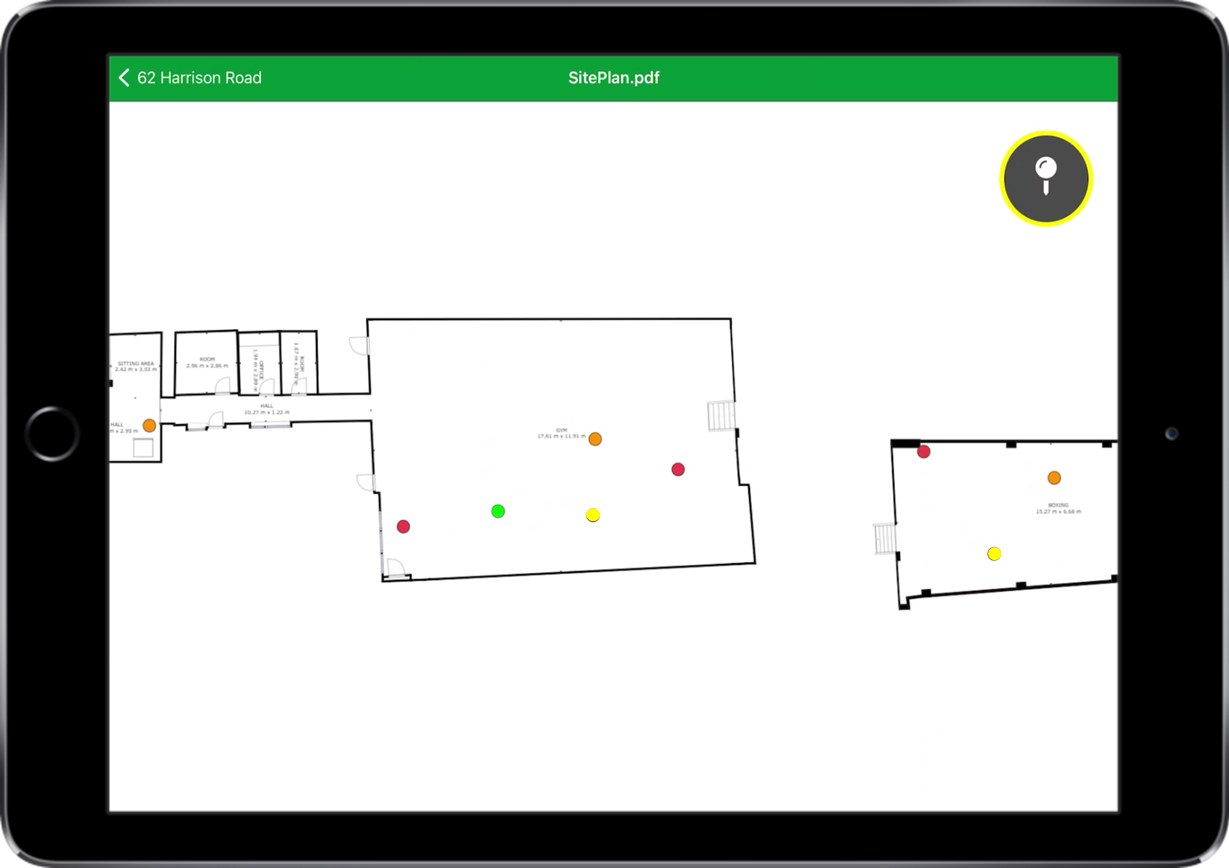
Note: SmartPins can be customised with colour coded condition ratings. In this template, we have applied a ''SmartRule" for each condition. This means the SmartPins will change to green if the condition is good, yellow if it is satisfactory, orange if it is fair and red if it is poor. To customise your condition ratings, contact helpdesk@goreport.com.
- Return to the main report list by selecting the report name on the top left corner.

Published Reports
- The SmartPin tabular data and marked up site plan will be visible in the published report.
- You will notice a new column has appeared within the SOC table called SmartPin.
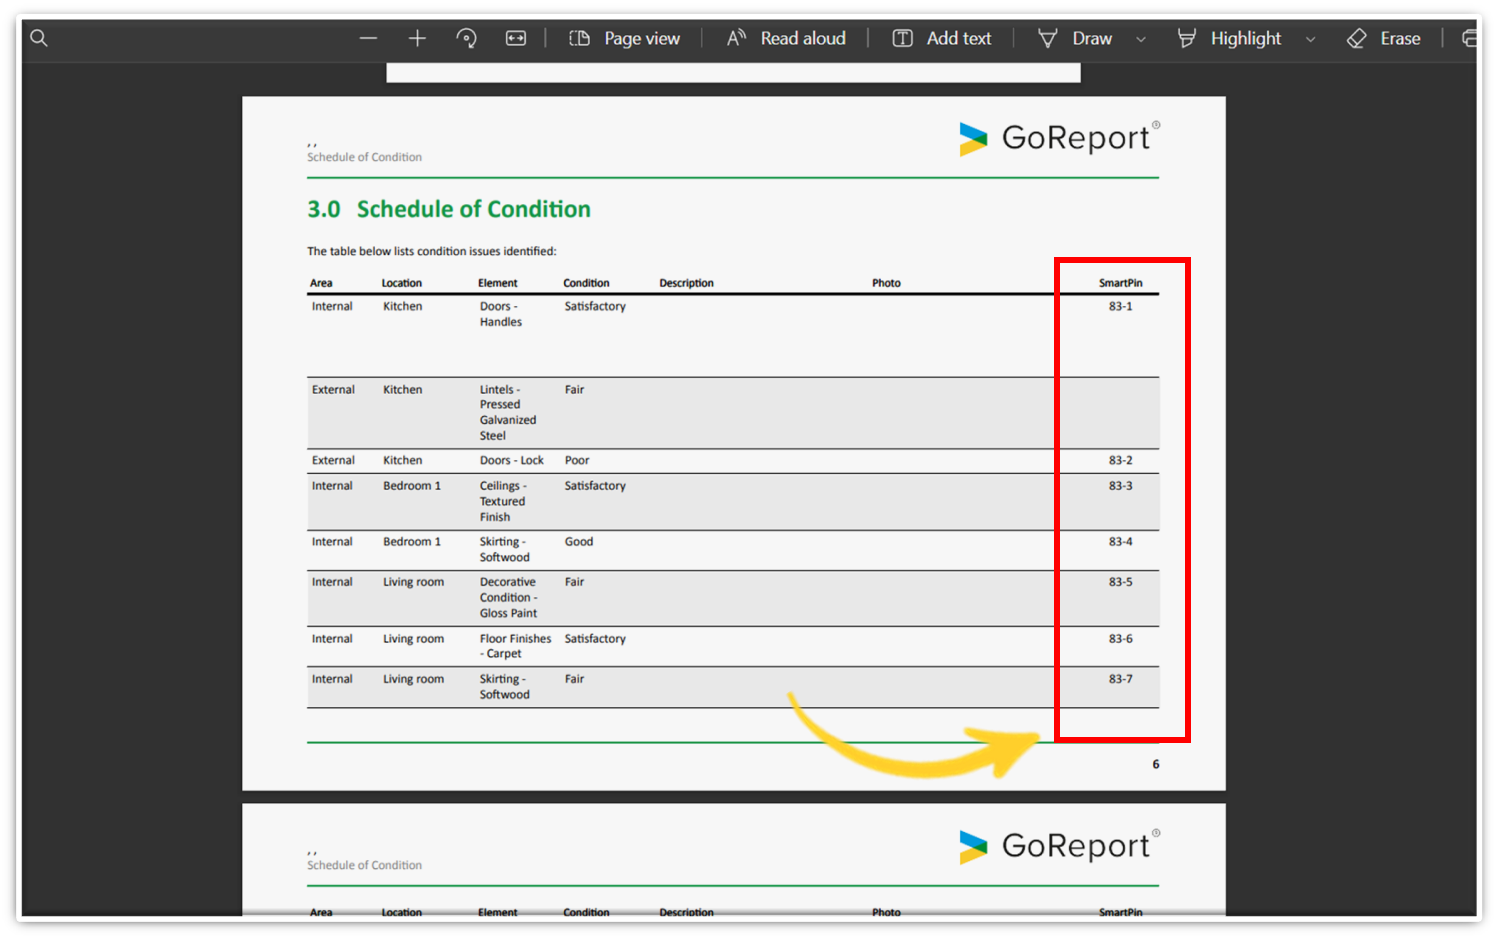
- The SmartPins on the site plan are interactive. Each SmartPin has a code that is linked to the SmartPin reference within the SOC table.
- By clicking on one of the SmartPins on the site plan, you will be taken to the table that shows the data associated with that pin.
Note: The tabular data is NOT interactive.